พื้นฐาน Java สร้าง Controls บน GUI และการสร้าง Action Event Handler กับ Controls |
พื้นฐาน Java สร้าง Controls บน GUI และการสร้าง Action Event Handler กับ Controls บทความก่อนหน้านี้เราได้ทำการสร้าง Form ด้วย JFrame ผ่าน Netbeans หรือ Eclipse เป็นมุมมองผ่าน Visual GUI และจะทำการ Generate Code ของ Java ให้อัตโนมัติ และบางครั้งหรือบ่อยครั้ง เราจำเป็นที่จะต้องรู้ด้วยว่า Control เหล่านั้น กว่าที่จะสร้างมาได้เป็นหน้าจอสวย ๆ และ Event ต่าง ๆ จะต้องเขียน Code อย่างไรบ้าง เช่น การสร้าง Control ของ Label ลงใน Form การสร้าง Button และการสร้าง Event Action ที่ผ่านการ Click เป็นต้น
บทความนี้จะขอทบทวนและอธิบายถึงขั้นตอนการเขียนแบบละเอียดและง่าย ๆ สามารถอ่านแล้วเข้าใจได้ในทันที โดยขั้นแรกนั้นขั้นตอนการสร้าง Form จะต้องเริ่มต้นด้วยการสร้าง Form หลักด้วย JFrame
package com.java.myapp;

import javax.swing.JFrame;

public class MyForm extends JFrame {

	public static void main(String[] args) {
		MyForm form = new MyForm();
		form.setVisible(true);
	}

	public MyForm() {

		// Create Form Frame
		super("ThaiCreate.Com Tutorial");
		setSize(450, 300);
		setLocation(500, 280);
		setDefaultCloseOperation(JFrame.EXIT_ON_CLOSE);
		getContentPane().setLayout(null);

	}

}
นี่คือรูปแบบการสร้าง Form หลักด้วย JFrame ซึ่งต่อไปนี้เราจะใช้รูปแบบนี้ได้ไปตลอด ซึ่งในขั้นตอนนี้เราจะเห็นว่าจะมีการกำหนดพวก Title , ขนาดของ Form , ตำแหน่งของ Form , รูปแบบ Layout
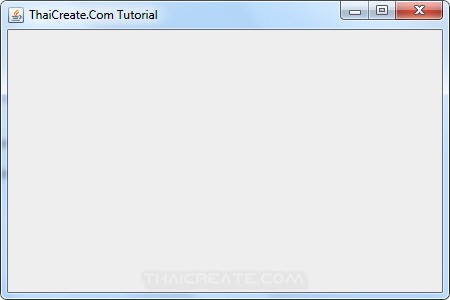
ผลลัพธ์ที่ได้
Part 1 : การสร้าง Label ลงใน Form
สำหรับขั้นตอนการสร้าง Controls ทุก ๆ ตัวนั้น เราจะเริ่มต้นด้วยการ new Class ของ Control นั้น ๆ เช่น JLabel จากนั้นกำหนดคุณสมบัติ Properties และสุดท้ายคือการ Add ลงใน Form
		// Create Label Hello
		JLabel lblHello = new JLabel("Hello");
		lblHello.setBounds(200, 53, 36, 14);
		getContentPane().add(lblHello);
รูปแบบการสร้าง Label
package com.java.myapp;

import javax.swing.JFrame;
import javax.swing.JLabel;

public class MyForm extends JFrame {

	public static void main(String[] args) {
		MyForm form = new MyForm();
		form.setVisible(true);
	}

	public MyForm() {

		// Create Form Frame
		super("ThaiCreate.Com Tutorial");
		setSize(450, 300);
		setLocation(500, 280);
		setDefaultCloseOperation(JFrame.EXIT_ON_CLOSE);
		getContentPane().setLayout(null);

		// Create Label Hello
		JLabel lblHello = new JLabel("Hello");
		lblHello.setBounds(200, 53, 36, 14);
		getContentPane().add(lblHello);

	}

}
โค้ดที่เพิ่มลงไป
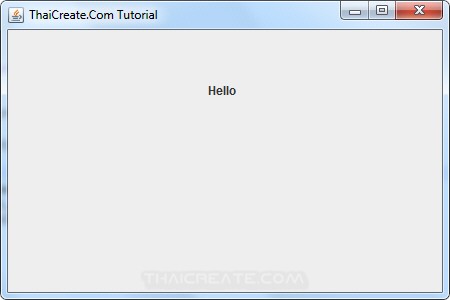
ผลลัพธ์ที่ได้
Part 2 : การสร้าง Button ลงใน Form
ในการสร้าง Button เราจะใช้ Class ของ JButton ที่อยู่ใน Swing ด้วยการ new JButton จากนั้นก็ Add ลงใน Form
		// Create Button Submit
		JButton btnSubmit = new JButton("Submit");
		btnSubmit.setBounds(171, 95, 89, 23);
		getContentPane().add(btnSubmit);
รูปแบบการสร้าง Button
package com.java.myapp;

import javax.swing.JButton;
import javax.swing.JFrame;
import javax.swing.JLabel;

public class MyForm extends JFrame {

	public static void main(String[] args) {
		MyForm form = new MyForm();
		form.setVisible(true);
	}

	public MyForm() {

		// Create Form Frame
		super("ThaiCreate.Com Tutorial");
		setSize(450, 300);
		setLocation(500, 280);
		setDefaultCloseOperation(JFrame.EXIT_ON_CLOSE);
		getContentPane().setLayout(null);

		// Create Label Hello
		JLabel lblHello = new JLabel("Hello");
		lblHello.setBounds(200, 53, 36, 14);
		getContentPane().add(lblHello);

		// Create Button Submit
		JButton btnSubmit = new JButton("Submit");
		btnSubmit.setBounds(171, 95, 89, 23);
		getContentPane().add(btnSubmit);

	}

}
โค้ดที่เพิ่มลงไป
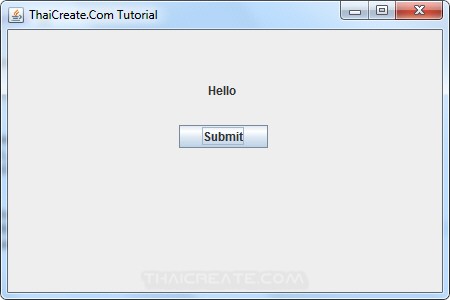
ผลลัพธ์ที่ได้
Part 3 : การสร้าง Event Action ให้กับ Button
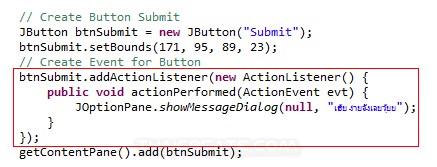
ในการสร้าง Event ของ Button ก็สามารถสร้างโดยการกำหนด Property ให้กับ Form ด้วยการเพิ่ม ActionListener ให้กับ Button เช่น
		// Create Button Submit
		JButton btnSubmit = new JButton("Submit");
		btnSubmit.setBounds(171, 95, 89, 23);
		// Create Event for Button
		btnSubmit.addActionListener(new ActionListener() {
			public void actionPerformed(ActionEvent evt) {
				JOptionPane.showMessageDialog(null, "เฮ้ย ง่ายจังเลยวุ้ยย");
			}
		});
		getContentPane().add(btnSubmit);
package com.java.myapp;

import java.awt.event.ActionEvent;
import java.awt.event.ActionListener;

import javax.swing.JButton;
import javax.swing.JFrame;
import javax.swing.JLabel;
import javax.swing.JOptionPane;

public class MyForm extends JFrame {

	public static void main(String[] args) {
		MyForm form = new MyForm();
		form.setVisible(true);
	}

	public MyForm() {

		// Create Form Frame
		super("ThaiCreate.Com Tutorial");
		setSize(450, 300);
		setLocation(500, 280);
		setDefaultCloseOperation(JFrame.EXIT_ON_CLOSE);
		getContentPane().setLayout(null);

		// Create Label Hello
		JLabel lblHello = new JLabel("Hello");
		lblHello.setBounds(200, 53, 36, 14);
		getContentPane().add(lblHello);

		// Create Button Submit
		JButton btnSubmit = new JButton("Submit");
		btnSubmit.setBounds(171, 95, 89, 23);
		// Create Event for Button
		btnSubmit.addActionListener(new ActionListener() {
			public void actionPerformed(ActionEvent evt) {
				JOptionPane.showMessageDialog(null, "เฮ้ย ง่ายจังเลยวุ้ยย");
			}
		});
		getContentPane().add(btnSubmit);

	}

}
โค้ดที่เพิ่มลงไป
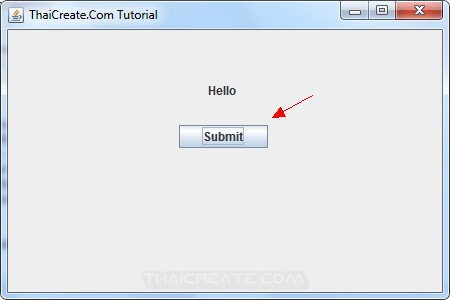
ผลลัพธ์ที่ได้ เมื่อทดสอบคลิกที่ Button
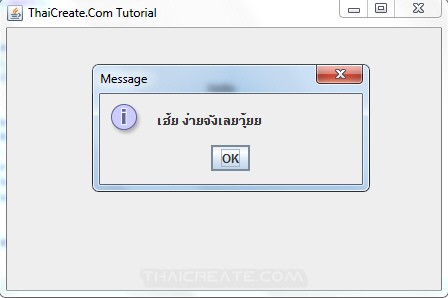
แสดง Event Action ที่เราสร้างขึ้น
หรือจะเขียนแยกมาอีก Method หนึ่งก็ได้เช่น
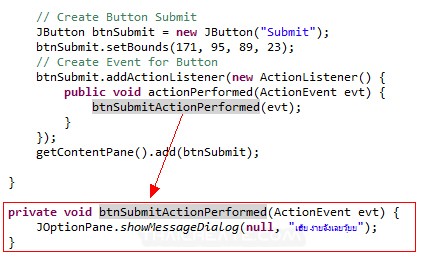
กรณีที่เขียนแยกมาอีก Method
package com.java.myapp;

import java.awt.event.ActionEvent;
import java.awt.event.ActionListener;

import javax.swing.JButton;
import javax.swing.JFrame;
import javax.swing.JLabel;
import javax.swing.JOptionPane;

public class MyForm extends JFrame {

	public static void main(String[] args) {
		MyForm form = new MyForm();
		form.setVisible(true);
	}


	public MyForm() {

		// Create Form Frame
		super("ThaiCreate.Com Tutorial");
		setSize(450, 300);
		setLocation(500, 280);
		setDefaultCloseOperation(JFrame.EXIT_ON_CLOSE);
		getContentPane().setLayout(null);

		// Create Label Hello
		JLabel lblHello = new JLabel("Hello");
		lblHello.setBounds(200, 53, 36, 14);
		getContentPane().add(lblHello);

		// Create Button Submit
		JButton btnSubmit = new JButton("Submit");
		btnSubmit.setBounds(171, 95, 89, 23);
		// Create Event for Button
		btnSubmit.addActionListener(new ActionListener() {
			public void actionPerformed(ActionEvent evt) {
				btnSubmitActionPerformed(evt);
			}
		});
		getContentPane().add(btnSubmit);

	}

    private void btnSubmitActionPerformed(ActionEvent evt) {
    	JOptionPane.showMessageDialog(null, "เฮ้ย ง่ายจังเลยวุ้ยย");
    }

}
จากตัวอย่างนี้เราจะเห็นว่าการสร้าง Controls ต่าง ๆ เช่น Label และ Button รวมทั้ง Event Action นั้นสามารถสร้างได้ง่าย ๆ และมีขั้นตอนที่ไม่ยากเลย และ เพียงเท่านี้เราก็สามารถที่จะนำความรู้ที่ได้จากบทความนี้ ไปใช้การเขียนกับ Control อื่น ๆ ได้เช่นเดียวกัน
เพิ่มเติม ในการเขียน GUI เพื่อรัน Application นั้นในส่วนของ Class main() ควรจะใช้ Thread เป็นตัว ควบคุมการเปิด Form นั้น ๆ เพราะจะทำให้ Process ของ Program ทำงานได้อย่างมีประสิทธิภาพ และป้องกัน Process อื่นที่ค้างอยู่ จะมีผลต่อการทำงานใน Form หรือ Windows ปัจจุบัน ซึ่งปกติทั้ง Eclipse และ Netbeans จะแนะนำให้ใช้ EventQueue.invokeLater ในการเรียก Form ทุกครั้ง
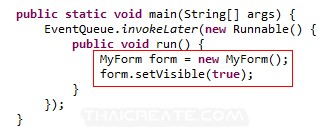
Code เต็ม ๆ
package com.java.myapp;

import java.awt.EventQueue;
import java.awt.event.ActionEvent;
import java.awt.event.ActionListener;

import javax.swing.JButton;
import javax.swing.JFrame;
import javax.swing.JLabel;
import javax.swing.JOptionPane;

public class MyForm extends JFrame {

	public static void main(String[] args) {
		EventQueue.invokeLater(new Runnable() {
			public void run() {
				MyForm form = new MyForm();
				form.setVisible(true);
			}
		});
	}


	public MyForm() {

		// Create Form Frame
		super("ThaiCreate.Com Tutorial");
		setSize(450, 300);
		setLocation(500, 280);
		setDefaultCloseOperation(JFrame.EXIT_ON_CLOSE);
		getContentPane().setLayout(null);

		// Create Label Hello
		JLabel lblHello = new JLabel("Hello");
		lblHello.setBounds(200, 53, 36, 14);
		getContentPane().add(lblHello);

		// Create Button Submit
		JButton btnSubmit = new JButton("Submit");
		btnSubmit.setBounds(171, 95, 89, 23);
		// Create Event for Button
		btnSubmit.addActionListener(new ActionListener() {
			public void actionPerformed(ActionEvent evt) {
				btnSubmitActionPerformed(evt);
			}
		});
		getContentPane().add(btnSubmit);

	}

    private void btnSubmitActionPerformed(ActionEvent evt) {
    	JOptionPane.showMessageDialog(null, "เฮ้ย ง่ายจังเลยวุ้ยย");
    }

}

|

