|
| |
Bootstrap คืออะไร จะใช้ Bootstrap กับการพัฒนาเว็บไซต์และ Application จะต้องทำอย่างไร ??? |
Bootstrap คืออะไร จะใช้ Bootstrap กับการพัฒนาเว็บไซต์และ Application จะต้องทำอย่างไร ??? ใครเวลานี้คงจะมีไม่กี่คนที่ยังไม่รู้จัก Bootstrap มันเป็น Front-end Framework ที่ประกอบด้วยโครงสร้าง CSS , HTML และ JavaScript ที่ช่วยให้เราสามารถสร้างหน้าจอ User Interface ได้ง่าย และ สวยงาม และรวดเร็ว ลดเวลาในการที่จะมานั่งออกแบบ Design หน้าจอ layout หรือรายการ Element อื่นๆ ที่เกี่ยวข้องกับหน้า Form ทั้งหมด ก็สามรรถใช้ Bootstrap เข้ามาจัดการได้ทั้งหมด สำหรับ Bootstrap เองมีทั้ง CSS Component และ JavaScript Plugin ที่ทำงานร่วมกับ jQuery ที่สามารถเรียกใช้งานได้มากมาย และที่สำคัญคือ Bootstrap มีการแสดงผลในรูปแบบของ Responsive ซึ่งจะแสดงสภาพแวดล้อมที่เหมาะสมกับอุปกรณ์ที่ทำการเปิดอยู่ในขณะนั้น เช่น PC Desktop , Tablets , Mobile หรืออุปกรณ์อื่นๆ ที่เกี่ยวข้อง ซึ่งทำให้เรานั้นออกแบบเว็บและเขียนคำสั่งสั่งต่างๆ ก็สามารถที่จะรองรับอปุกรณ์ทั้งหมดได้เลย
รู้จักทีมผู้พัฒนา
Bootstrap ถูกพัฒนาขึ้นโดย Mark Otto และ Jacob Thornton ทีมพัฒนาของ Twitter Inc. ก่อนหน้านี้ใช้ชื่อว่า Twitter Blueprint และเปิดให้นักพัฒนาสามารถนำไปใช้งานพัฒนาเว็บไซต์ได้แบบฟรี ( Open Source ) ในชื่อว่า Bootstrap Framework
 Bootstrap is the most popular HTML, CSS, and JS framework for developing responsive, mobile first projects on the web.
Bootstrap ปัจจุบันมีการพัฒนาขึ้นด้วยกลุ่มนักพัฒนาจากทั่วทุกหนแห่งในโลก มีการอัปเดทแก้ไข bug อยู่ตลอดเวลา เพื่อรองรับการทำงานได้อย่างไม่มีปัญหาพร้อมๆ กับการพัฒนาเทคโนโลยี่บน Web Browser เช่น CSS , HTML และในปัจจุบันเราจะเห็นว่า Bootstrap มีตัวอย่างธีมให้ดาวน์โหลดมากมาย มีทั้งที่สามารถดาวน์โหลดใช้ได้ฟรี และ แบบเสียเงินซื้อ และหลายๆ เว็บก็เลือกที่จะใช้ Bootstrap กันมากขึ้น สำหรับแอดมินเองก็มีการนำ Bootstrap มาใช้กับ Project ใหญ่ๆ หลายตัวแล้ว และที่ผ่านมาก็สามารถตอบโจทย์ของลูกค้าได้เป็นอย่างดี
โครงสร้างของ Bootstrap Framework
- Scaffolding grid system จำนวน 12 คอลัมน์ สามารถเลือกใช้ได้ทั้งแบบ fixed และแบบ fluid
เป็นโครงสร้างของ Layout ที่จะแสดงผลในหน้าจอ ซึ่งจำนวน Column นี้จะแสดงผลตามความกว้างของแต่ล่ะอุปกรณ์ที่เรียกใช้งาน
- Base CSS style sheets สำหรับ html elements พื้นฐาน เช่น typography, tables, forms และ images
เป็น Stylesheet พื้นฐานที่เราสามารถเรียกใช้งานได้เลย เช่น Button ที่อยู่ในรูปแบบของ สีต่างๆ การแสดงรูปภาพ ตาราง และอื่นๆ
- Components style sheets สำหรับสิ่งที่เราต้องใช้บ่อยๆ ไม่ว่าจะเป็น navigation, breadcrumbs รวมไปถึง pagination
เป็นโครงสร้างพื้นฐานของ Bootstrap ที่ไว้จัดการ Menu , Navigation ซึ่งจะแปรผันกับขนาดของหน้าจอ ของอปุกรณ์ที่เรียกใช้งาน
- JavaScript jQuery plugins ต่างๆ ไม่ว่าจะเป็น modal, carousel หรือ tooltip
ช่วยในการสร้าง Popup, Dialog , Tooltip ต่างๆ ซึ่งบอกได้เลยว่าเรียกใช้งานได้ง่ายมากๆ
ถึงแม่ว่า Bootstrap จะมีโครงสร้างพื้นฐานที่บังคับให้การออกแบบเป็นไปตาม Framework ออกแบบและที่มีมาให้ แต่เราก็สามารถที่จะเขียนพวก CSS และ Stylesheet เพิ่มเติม เพื่อเข้าไปจัดการกับ UI ต่างๆ ที่ต้องการได้ แต่ทั้งนี้จะต้องให้เข้าใจโครงสร้างของมันซะก่อน ไม่ฉะนั้นเมื่อนำไปใช้งานกับขนาดของอุกรณ์ต่างๆ อาจจะมีปัญหาในการแสดงผลได้
เริ่มต้นการใช้งาน Bootstrap ??
ในการใช้งาน Bootstrap มีทางเลือกอยู่ 2 วิธีคือ ดาวน์โหลดไฟล์มาเก็บไว้ที่ Project หรือเรียกใช้จาก Bootstrap CDN (ไฟล์จาก Server ของ CDN) แต่ถ้าจะให้แนะนำ ควรเลือกใช้วิธีแรก เพราะจะสามารถเรียกและใช้งานแบบ Offline ได้ด้วย
Download Bootstrap
ก่อนอื่นให้ดาวน์โหลดไฟล์ต่างๆ ของ Bootstrap

ให้เลือกดาวน์โหลดแค่เฉพาะ Download Bootstrap เท่านั้น ไม่จำเป็นจะต้องใช้แบบ Source Code

หลังจากดาวน์โหลดแล้วเราจะได้ไฟล์ที่ประกอบด้วย 3 โฟเดอร์คือ css, font , js
โครงสร้างของ Bootstrap Framework
bootstrap/
├── css/
│ ├── bootstrap.css
│ ├── bootstrap.css.map
│ ├── bootstrap.min.css
│ ├── bootstrap.min.css.map
│ ├── bootstrap-theme.css
│ ├── bootstrap-theme.css.map
│ ├── bootstrap-theme.min.css
│ └── bootstrap-theme.min.css.map
├── js/
│ ├── bootstrap.js
│ └── bootstrap.min.js
└── fonts/
├── glyphicons-halflings-regular.eot
├── glyphicons-halflings-regular.svg
├── glyphicons-halflings-regular.ttf
├── glyphicons-halflings-regular.woff
└── glyphicons-halflings-regular.woff2
การเรียกใช้งาน พื้นฐานทั่วไปเราจะเรียกใช้แค่ bootstrap.min.css และ bootstrap.min.js
<link href="css/bootstrap.min.css" rel="stylesheet">
<script src="js/bootstrap.min.js"></script>
แต่ในการใช้งานจริง อาจจะมีการเรียกใช้พวก jQuery และ Library อื่นๆ เช่น js และ cs ที่รองรับพวก IE8 ด้วย
<!DOCTYPE html>
<html lang="en">
  <head>
    <meta charset="utf-8">
    <meta http-equiv="X-UA-Compatible" content="IE=edge">
    <meta name="viewport" content="width=device-width, initial-scale=1">
    <!-- The above 3 meta tags *must* come first in the head; any other head content must come *after* these tags -->
    <title>Bootstrap 101 Template</title>

    <!-- Bootstrap -->
    <link href="css/bootstrap.min.css" rel="stylesheet">

    <!-- HTML5 shim and Respond.js for IE8 support of HTML5 elements and media queries -->
    <!-- WARNING: Respond.js doesn't work if you view the page via file:// -->
    <!--[if lt IE 9]>
      <script src="https://oss.maxcdn.com/html5shiv/3.7.3/html5shiv.min.js"></script>
      <script src="https://oss.maxcdn.com/respond/1.4.2/respond.min.js"></script>
    <![endif]-->
  </head>
  <body>
    <h1>Hello, world!</h1>

    <!-- jQuery (necessary for Bootstrap's JavaScript plugins) -->
    <script src="http://code.jquery.com/jquery-latest.min.js"></script>
    <!-- Include all compiled plugins (below), or include individual files as needed -->
    <script src="js/bootstrap.min.js"></script>
  </body>
</html>
Note!! ในปัจจุบันไฟล์ js แนะนำให้ include ไว้ล่างสุดของ page
นอกจากนี้เพื่อป้องกัน IE แสดงผลแบบ compatible mode เราจะต้องกำหนดแท็ก <meta> เพิ่มเติม เพื่อเป็นการบอก browser IE ให้ใช้ engine เวอร์ชั่นล่าสุดในการแสดงผลเว็บเพจของเรา
<meta http-equiv="X-UA-Compatible" content="IE=edge" />
แจ้งให้ Web Browser ทราบว่าไซต์นี้ถูกออกแบบให้แสดงผลได้อย่างเหมาะสมกับขนาดของอปุกรณ์ต่างๆ
<meta name="viewport" content="width=device-width, initial-scale=1" />
เนื่องจาก IE8 ยังไม่ Support ตัว Bootstrap ฉะนั้นเราจะใช้ ไฟล์ต่างๆ เหล่านี้เข้ามาทดแทนการทำงานของ Bootstrap
      <script src="https://oss.maxcdn.com/html5shiv/3.7.3/html5shiv.min.js"></script>
      <script src="https://oss.maxcdn.com/respond/1.4.2/respond.min.js"></script>
ในการเริ่มต้นใช้ Bootstrap จะจะต้อมเริ่มต้นด้วย container ซึ่งจะเป็น Layout ที่ครอบเนื้อหาของ Content ในหน้านั้นๆ
    <div class="container">
		<div class="row">

		</div>
    </div>
Example ตัวอย่างการใช้ Bootstrap ในรูปแบบง่ายๆ
Ex1 : การใช้งาน Button
				<button type="button" class="btn">Basic</button>
				<button type="button" class="btn btn-default">Default</button>
				<button type="button" class="btn btn-primary">Primary</button>
				<button type="button" class="btn btn-success">Success</button>
				<button type="button" class="btn btn-info">Info</button>
				<button type="button" class="btn btn-warning">Warning</button>
				<button type="button" class="btn btn-danger">Danger</button>
				<button type="button" class="btn btn-link">Link</button>

Ex2 : การใช้งาน Table
				<table class="table">
					<thead>
						<tr>
							<th>#</th>
							<th>First Name</th>
							<th>Last Name</th>
							<th>Username</th>
						</tr>
					</thead>
					<tbody>
						<tr>
							<td>1</td>
							<td>Mark</td>
							<td>Otto</td>
							<td>@mdo</td>
						</tr>
						<tr>
							<td>2</td>
							<td>Jacob</td>
							<td>Thornton</td>
							<td>@fat</td>
						</tr>
						<tr>
							<td>3</td>
							<td>Larry</td>
							<td>the Bird</td>
							<td>@twitter</td>
						</tr>
					</tbody>
				</table>

Ex4 : การอกแบบ Form
				<form>
				  <div class="form-group">
					<label for="email">Email address:</label>
					<input type="email" class="form-control" id="email">
				  </div>
				  <div class="form-group">
					<label for="pwd">Password:</label>
					<input type="password" class="form-control" id="pwd">
				  </div>
				  <div class="checkbox">
					<label><input type="checkbox"> Remember me</label>
				  </div>
				  <button type="submit" class="btn btn-default">Submit</button>
				</form>

Ex4 : การใช้ Glyphicon เพื่อสร้าง Icon
				<p>Envelope icon: <span class="glyphicon glyphicon-envelope"></span></p>
				<p>Envelope icon as a link:
				  <a href="#"><span class="glyphicon glyphicon-envelope"></span></a>
				</p>
				<p>Search icon: <span class="glyphicon glyphicon-search"></span></p>
				<p>Search icon on a button:
				  <button type="button" class="btn btn-default">
					<span class="glyphicon glyphicon-search"></span> Search
				  </button>
				</p>
				<p>Search icon on a styled button:
				  <button type="button" class="btn btn-info">
					<span class="glyphicon glyphicon-search"></span> Search
				  </button>
				</p>
				<p>Print icon: <span class="glyphicon glyphicon-print"></span></p>
				<p>Print icon on a styled link button:
				  <a href="#" class="btn btn-success btn-lg">
					<span class="glyphicon glyphicon-print"></span> Print
				  </a>
				</p>

Code ทั้งหมด
<!DOCTYPE html>
<html lang="en">
  <head>
    <meta charset="utf-8">
    <meta http-equiv="X-UA-Compatible" content="IE=edge">
    <meta name="viewport" content="width=device-width, initial-scale=1">
    <!-- The above 3 meta tags *must* come first in the head; any other head content must come *after* these tags -->
    <title>Bootstrap 101 Template</title>

    <!-- Bootstrap -->
    <link href="css/bootstrap.min.css" rel="stylesheet">

    <!-- HTML5 shim and Respond.js for IE8 support of HTML5 elements and media queries -->
    <!-- WARNING: Respond.js doesn't work if you view the page via file:// -->
    <!--[if lt IE 9]>
      <script src="https://oss.maxcdn.com/html5shiv/3.7.3/html5shiv.min.js"></script>
      <script src="https://oss.maxcdn.com/respond/1.4.2/respond.min.js"></script>
    <![endif]-->
  </head>
  <body>
    <h1>Hello, world!</h1>

    <div class="container">
		<div class="row">

				<!-- Button -->
				<button type="button" class="btn">Basic</button>
				<button type="button" class="btn btn-default">Default</button>
				<button type="button" class="btn btn-primary">Primary</button>
				<button type="button" class="btn btn-success">Success</button>
				<button type="button" class="btn btn-info">Info</button>
				<button type="button" class="btn btn-warning">Warning</button>
				<button type="button" class="btn btn-danger">Danger</button>
				<button type="button" class="btn btn-link">Link</button>
				<br /><br/ >

				<!-- Table -->
				<table class="table">
					<thead>
						<tr>
							<th>#</th>
							<th>First Name</th>
							<th>Last Name</th>
							<th>Username</th>
						</tr>
					</thead>
					<tbody>
						<tr>
							<td>1</td>
							<td>Mark</td>
							<td>Otto</td>
							<td>@mdo</td>
						</tr>
						<tr>
							<td>2</td>
							<td>Jacob</td>
							<td>Thornton</td>
							<td>@fat</td>
						</tr>
						<tr>
							<td>3</td>
							<td>Larry</td>
							<td>the Bird</td>
							<td>@twitter</td>
						</tr>
					</tbody>
				</table>

				<!-- Form -->
				<form>
				  <div class="form-group">
					<label for="email">Email address:</label>
					<input type="email" class="form-control" id="email">
				  </div>
				  <div class="form-group">
					<label for="pwd">Password:</label>
					<input type="password" class="form-control" id="pwd">
				  </div>
				  <div class="checkbox">
					<label><input type="checkbox"> Remember me</label>
				  </div>
				  <button type="submit" class="btn btn-default">Submit</button>
				</form>

				<!-- Glyphicon  -->
				<p>Envelope icon: <span class="glyphicon glyphicon-envelope"></span></p>
				<p>Envelope icon as a link:
				  <a href="#"><span class="glyphicon glyphicon-envelope"></span></a>
				</p>
				<p>Search icon: <span class="glyphicon glyphicon-search"></span></p>
				<p>Search icon on a button:
				  <button type="button" class="btn btn-default">
					<span class="glyphicon glyphicon-search"></span> Search
				  </button>
				</p>
				<p>Search icon on a styled button:
				  <button type="button" class="btn btn-info">
					<span class="glyphicon glyphicon-search"></span> Search
				  </button>
				</p>
				<p>Print icon: <span class="glyphicon glyphicon-print"></span></p>
				<p>Print icon on a styled link button:
				  <a href="#" class="btn btn-success btn-lg">
					<span class="glyphicon glyphicon-print"></span> Print
				  </a>
				</p>

		</div>
    </div>

    <!-- jQuery (necessary for Bootstrap's JavaScript plugins) -->
    <script src="http://code.jquery.com/jquery-latest.min.js"></script>
    <!-- Include all compiled plugins (below), or include individual files as needed -->
    <script src="js/bootstrap.min.js"></script>
  </body>
</html>
จากตัวอย่างเป็นเพียงคำสั่งพื้นฐานของ Bootstrap Framework เท่านั้น แต่ในการใช้งานจริงมันยังสามารถทำอะไรได้อีกมากมาย และในปัจจุบันมันมีธีมให้ดาวน์โหลดเยะมาก และ เราก็ไม่จำเป็นจะต้องมานั่งศึกษามันให้เสียเวลา ให้เอาเวลาไปนั่งแกะธีมที่เราเลือกมาใช้ ซึ่งจะเป็นการค่อยๆ เรียนรู้โครงสร้างของ Bootstrap Framework ไปในตัว
Bootstrap Themes SB Admin ของดีแนะนำต่อ ธีม Bootstrap กับ jQuery plugins
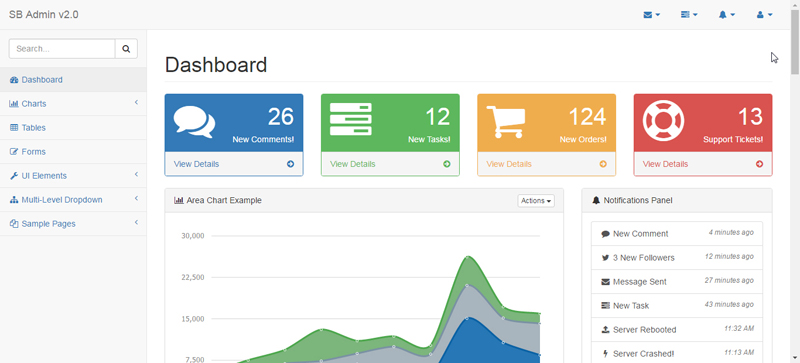
Download
AdminLTE Bootstrap Themes เหมาะสำหรับทำระบบ Admin หรือ Web Application
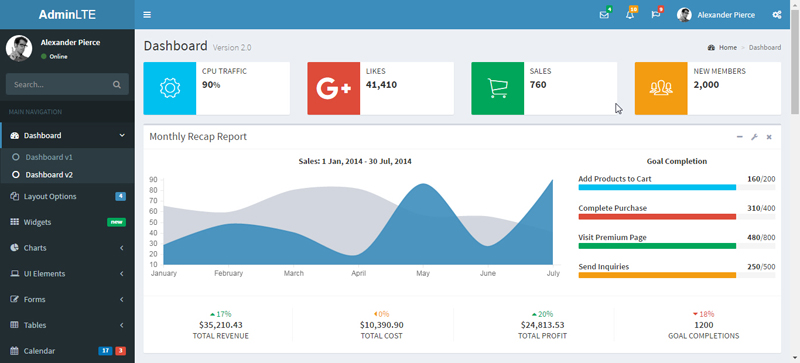
Download
| |
|
|
|
|
 |
|
|
| |
By : |
TC Admin
|
| |
Article : |
บทความเป็นการเขียนโดยสมาชิก หากมีปัญหาเรื่องลิขสิทธิ์ กรุณาแจ้งให้ทาง webmaster ทราบด้วยครับ |
| |
Score Rating : |
 |
| |
Create Date : |
2017-04-12 |
| |
Download : |
No files |
|
|
|

|


