ตอนที่ 5 : Windows Store App : Register Form (Azure Mobile Services) |
ตอนที่ 5 : Windows Store App : Register Form (Azure Mobile Services) บทความนี้จะเป็นการ Show case ยกตัวอย่างการทำระบบ Member register รับข้อมูลจากเครื่องที่ติดตั้ง App ของ Windows Store App เช่น username , password , name , email และ tel โดยจะทำการส่งข้อมูลทั้งหมดเหล่านี้ไปจัดเก็บไว้ที่ตาราง Table ของ Mobile Service ที่อยู่บน Windows Azure
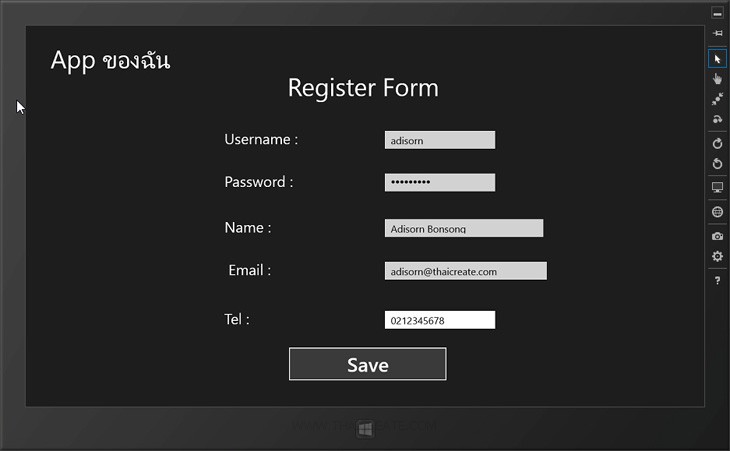 Windows Store App and Mobile Services Register Form
บทความนี้ถือเป็นการทบทวนและประยุกต์ใช้จากการศึกษาในหัวข้อที่ผ่าน ๆ มา ซึ่งการทำนั้นก็ไม่ต่างอะไรกับการออกแบบ Form รับข้อมูลบน Windows Store App และ Insert ลงไปใน Table ของ Mobile Services
Example ตัวอย่างการทำระบบลงทะเบียน Member Register Form

ตอนนี้เรามี Mobile Services อยู่ 1 รายการ

ชื่อตารางว่า MyMember

มีข้อมูลอยู่ 2 รายการ
กลับมายัง Project ของ Windows Store App บน Visual Studio
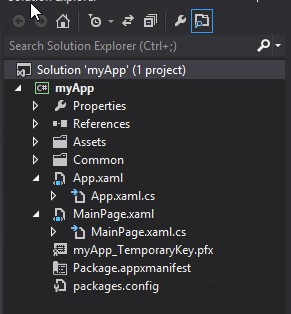
โครงสร้างไฟล์
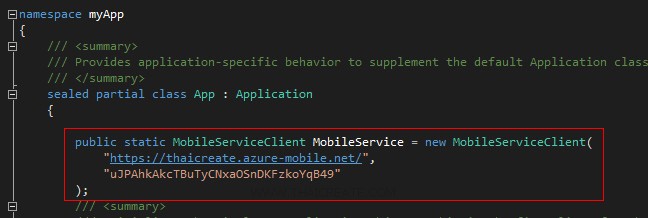
ในไฟล์ App.xaml.cs ให้ Copy Url และ key มาวางดังรูป จากนั้นออกแบบ Layout และเขียน Code ดังนี้
MainPage.xaml
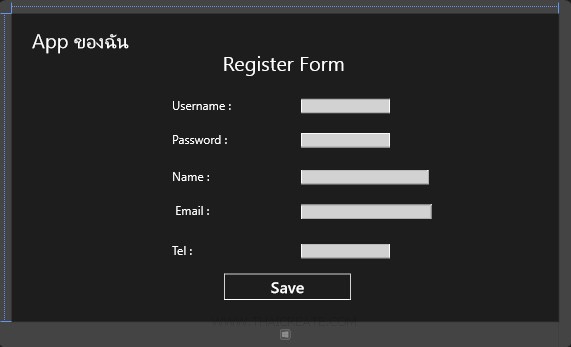
<Page
    x:Class="myApp.MainPage"
    xmlns="http://schemas.microsoft.com/winfx/2006/xaml/presentation"
    xmlns:x="http://schemas.microsoft.com/winfx/2006/xaml"
    xmlns:local="using:myApp"
    xmlns:d="http://schemas.microsoft.com/expression/blend/2008"
    xmlns:mc="http://schemas.openxmlformats.org/markup-compatibility/2006"
    mc:Ignorable="d">

    <Grid Background="{StaticResource ApplicationPageBackgroundThemeBrush}">

        <TextBlock HorizontalAlignment="Left" Margin="50,41,0,0" TextWrapping="Wrap" VerticalAlignment="Top" FontSize="50" Width="355" Height="80">
        	<Run Text="App ของฉัน"/>
        	<LineBreak/>
        	<Run/>
        </TextBlock>

        <!--ContentPanel - place additional content here-->
        <Grid x:Name="ContentPanel" Margin="12,2,12,-2">
            <TextBlock HorizontalAlignment="Left" Margin="515,95,0,0" TextWrapping="Wrap" Text="Register Form" VerticalAlignment="Top" FontSize="50"/>

            <TextBlock HorizontalAlignment="Left" Margin="388,210,0,0" TextWrapping="Wrap" Text="Username :" VerticalAlignment="Top" FontSize="30"/>
            <TextBox x:Name="txtUsername" HorizontalAlignment="Left" Height="36" Margin="711,210,0,0" TextWrapping="Wrap" VerticalAlignment="Top" Width="222" FontSize="20"/>

            <TextBlock HorizontalAlignment="Left" Margin="388,296,0,0" TextWrapping="Wrap" Text="Password :" VerticalAlignment="Top" FontSize="30"/>
            <PasswordBox x:Name="txtPassword" HorizontalAlignment="Left" Margin="711,296,0,0" VerticalAlignment="Top" Width="222" RenderTransformOrigin="1.072,1.969" Height="36"/>

            <TextBlock HorizontalAlignment="Left" Margin="388,388,0,0" TextWrapping="Wrap" Text="Name :" VerticalAlignment="Top" FontSize="30"/>
            <TextBox x:Name="txtName" HorizontalAlignment="Left" Height="36" Margin="711,388,0,0" TextWrapping="Wrap" VerticalAlignment="Top" Width="319" FontSize="20"/>

            <TextBlock HorizontalAlignment="Left" Margin="396,474,0,0" TextWrapping="Wrap" Text="Email :" VerticalAlignment="Top" FontSize="30"/>
            <TextBox x:Name="txtEmail" HorizontalAlignment="Left" Height="36" Margin="711,474,0,0" TextWrapping="Wrap" VerticalAlignment="Top" Width="326" FontSize="20"/>

            <TextBlock HorizontalAlignment="Left" Margin="388,573,0,0" TextWrapping="Wrap" Text="Tel :" VerticalAlignment="Top" FontSize="30"/>
            <TextBox x:Name="txtTel" HorizontalAlignment="Left" Height="36" Margin="711,573,0,0" TextWrapping="Wrap" VerticalAlignment="Top" Width="222" FontSize="20"/>

            <Button x:Name="btnSave" Content="Save" HorizontalAlignment="Left" Margin="515,644,0,0" VerticalAlignment="Top" Click="btnSave_Click" RenderTransformOrigin="8.238,3.789" FontSize="40" Width="323"/>
        </Grid>


    </Grid>
</Page>
MainPage.xaml.cs
using System;
using System.Collections.Generic;
using System.IO;
using System.Linq;
using Windows.Foundation;
using Windows.Foundation.Collections;
using Windows.UI.Xaml;
using Windows.UI.Xaml.Controls;
using Windows.UI.Xaml.Controls.Primitives;
using Windows.UI.Xaml.Data;
using Windows.UI.Xaml.Input;
using Windows.UI.Xaml.Media;
using Windows.UI.Xaml.Navigation;

using Microsoft.WindowsAzure.MobileServices;
using Newtonsoft.Json;
using Windows.UI.Popups;

// The Blank Page item template is documented at http://go.microsoft.com/fwlink/?LinkId=234238

namespace myApp
{
    /// <summary>
    /// An empty page that can be used on its own or navigated to within a Frame.
    /// </summary>
    ///
    public class MyMember
    {
        public int Id { get; set; }

        [JsonProperty(PropertyName = "username")]
        public string Username { get; set; }

        [JsonProperty(PropertyName = "password")]
        public string Password { get; set; }

        [JsonProperty(PropertyName = "name")]
        public string Name { get; set; }

        [JsonProperty(PropertyName = "tel")]
        public string Tel { get; set; }

        [JsonProperty(PropertyName = "email")]
        public string Email { get; set; }
    }

    public sealed partial class MainPage : Page
    {

        private MobileServiceCollection<MyMember, MyMember> items;
        private IMobileServiceTable<MyMember> memberTable = App.MobileService.GetTable<MyMember>();

        public MainPage()
        {
            this.InitializeComponent();
        }

        private async  void btnSave_Click(object sender, RoutedEventArgs e)
        {
            try
            {
                items = await memberTable.ToCollectionAsync();
                var insertItem = new MyMember
                {
                    Username = txtUsername.Text
                    ,
                    Password = txtPassword.Password
                    ,
                    Name = txtName.Text
                    ,
                    Email = txtEmail.Text
                    ,
                    Tel = txtTel.Text
                };
                await memberTable.InsertAsync(insertItem);
                items.Add(insertItem);

                // Dailog
                MessageDialog msgDialog = new MessageDialog("Register Data Successfully.", "Status :");
                await msgDialog.ShowAsync();

            }
            catch (MobileServiceInvalidOperationException ex)
            {
                throw ex;
            }
        }
        /// <summary>
        /// Invoked when this page is about to be displayed in a Frame.
        /// </summary>
        /// <param name="e">Event data that describes how this page was reached.  The Parameter
        /// property is typically used to configure the page.</param>
        protected override void OnNavigatedTo(NavigationEventArgs e)
        {
        }


    }
}
Screenshot

Register Form ทำการ Input ข้อมูล
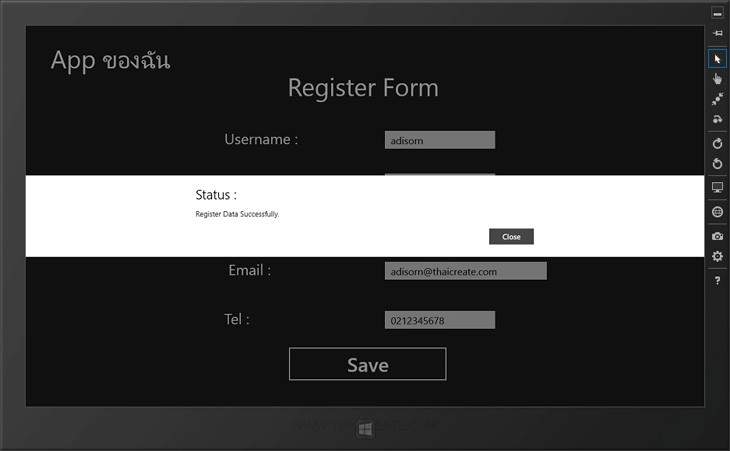
Register Form ทำการ Input ข้อมูล กรอกข้อมูลต่าง ๆ ที่ต้องการ

มื่อกลับไปดูที่ Mobile Services บน Windows Azure ก็จะมีข้อมูลกรากฏขึ้นมา 1 รายการ
สามารถทำการดาวน์โหลด Code ทั้งหมดได้จากไฟล์แนบในบทความนี้
|