Android ListView แบบ Custom Layout แสดงข้อมูล ListView หลายคอลัมบ์ Multiple Column |
Android Listview แบบ Custom Layout ตัวอย่างการใช้ ListView แบบ Custom Multiple Column Layout โดยจะสร้าง Layout ที่เป็นหลาย Column เพื่อจะนำ Column นั้นมาเป็นรูปแบบการแสดงผลของ ListView และข้อมูลที่จะนำมา Map กับ ListView จะใช้เป็นแบบ HashMap ซึ่งจะมีการเก็บข้อมูลแบบ Key และ Value ผ่าน SimpleAdapter ของ Android
		/*** Rows 1 ***/
		map = new HashMap<String, String>();
		map.put("MemberID", "1");
		map.put("Name", "Weerachai");
		map.put("Tel", "0819876107");
		MyArrList.add(map);

		/*** Rows 2 ***/
		map = new HashMap<String, String>();
		map.put("MemberID", "2");
		map.put("Name", "Win");
		map.put("Tel", "021978032");
		MyArrList.add(map);
ตัวอย่างการสร้างข้อมูลในรูปแบบของ HashMap ที่ประกอบด้วย Key และ Value
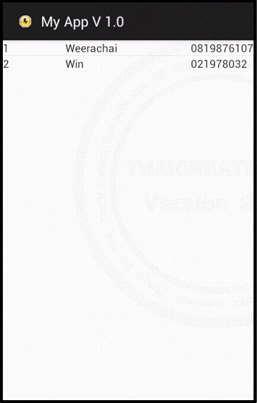
ListView แสดงข้อมูลแบบ Multiple Column ด้วย Custom Layout
จาก Screenshot ของ ListView จะแบ่งการแสดงผลข้อมูลออกเป็น 3 Column ซึ่ง Column เหล่านี้จะมาจาก Custom Layout ของ activity_column.xml
        SimpleAdapter sAdap;
        sAdap = new SimpleAdapter(MainActivity.this, MyArrList, R.layout.activity_column,
                new String[] {"MemberID", "Name", "Tel"}, new int[] {R.id.ColMemberID, R.id.ColName, R.id.ColTel});
        lisView1.setAdapter(sAdap);
ใน setAdapter จะมีการ Map ข้อมูลจาก HashMap กับ R.layout.activity_column และ Widgets รวมทั้ง Key ของข้อมูล
Code เต็ม ๆ
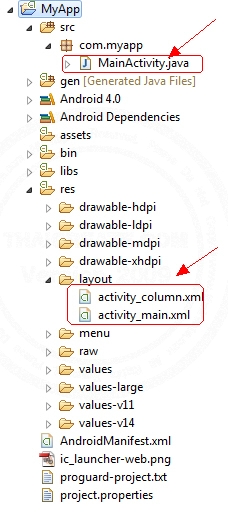
โครงสร้างของไฟล์ประกอบด้วย 3 ไฟล์คือ MainActivity.java, activity_main.xml และ activity_column.xml
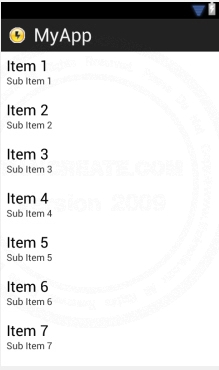
activity_main.xml
<LinearLayout xmlns:android="http://schemas.android.com/apk/res/android"
      android:orientation="horizontal"
      android:layout_width="fill_parent"
      android:layout_height="wrap_content"
      android:layout_weight="0.1">

   <ListView
       android:id="@+id/listView1"
       android:layout_width="match_parent"
       android:layout_height="wrap_content">
   </ListView>

</LinearLayout>

activity_column.xml
<LinearLayout xmlns:android="http://schemas.android.com/apk/res/android"
	android:id="@+id/linearLayout1"
	android:layout_width="fill_parent"
	android:layout_height="fill_parent" >

	<TextView
	android:id="@+id/ColMemberID"
		android:layout_width="0dp"
		android:layout_height="wrap_content"
		android:layout_weight="1"
		android:text="MemberID"/>

	<TextView
		android:id="@+id/ColName"
		android:layout_width="0dp"
		android:layout_height="wrap_content"
		android:layout_weight="2"
		android:text="Name"/>

	<TextView
	    android:id="@+id/ColTel"
	    android:layout_width="0dp"
	    android:layout_height="wrap_content"
	    android:layout_weight="1"
	    android:text="Tel" />

</LinearLayout>
MainActivity.java
package com.myapp;

import java.util.ArrayList;
import java.util.HashMap;

import android.os.Bundle;
import android.app.Activity;
import android.view.Menu;
import android.widget.ListView;
import android.widget.SimpleAdapter;

public class MainActivity extends Activity {


    @Override
    public void onCreate(Bundle savedInstanceState) {
        super.onCreate(savedInstanceState);
        setContentView(R.layout.activity_main);

        // listView1
        final ListView lisView1 = (ListView)findViewById(R.id.listView1);

		ArrayList<HashMap<String, String>> MyArrList = new ArrayList<HashMap<String, String>>();
		HashMap<String, String> map;

		/*** Rows 1 ***/
		map = new HashMap<String, String>();
		map.put("MemberID", "1");
		map.put("Name", "Weerachai");
		map.put("Tel", "0819876107");
		MyArrList.add(map);

		/*** Rows 2 ***/
		map = new HashMap<String, String>();
		map.put("MemberID", "2");
		map.put("Name", "Win");
		map.put("Tel", "021978032");
		MyArrList.add(map);

        SimpleAdapter sAdap;
        sAdap = new SimpleAdapter(MainActivity.this, MyArrList, R.layout.activity_column,
                new String[] {"MemberID", "Name", "Tel"}, new int[] {R.id.ColMemberID, R.id.ColName, R.id.ColTel});
        lisView1.setAdapter(sAdap);


    }


    @Override
    public boolean onCreateOptionsMenu(Menu menu) {
        getMenuInflater().inflate(R.menu.activity_main, menu);
        return true;
    }

}
Screenshot
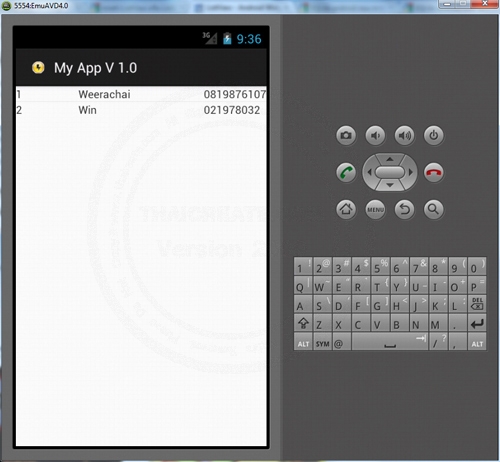
แสดงข้อมูล ListView แบบหลาย Column
Basic Android and ListView Widgets
Basic Android and ListView Widgets and SQLite Database
|