ตอนที่ 3 : Android C# (Xamarin) สร้างตาราง Table บน Mobile Services และการ Insert ข้อมูล |
ตอนที่ 3 : Android C# (Xamarin) สร้างตาราง Table บน Mobile Services และการ Insert ข้อมูล บทความนี้ขอต่อจากตอนที่แล้ว โดยจะยกเคสในกรณีที่เรามี App หรือ Project อยู่แล้ว แต่ต้องการที่จะเรียกใช้ Mobile Services ซึ่งจะเป็นการสร้าง Table ไว้สำหรับจัดเก็บข้อมูลบน Mobile Services การเขียนคำสั่งในฝั่งของ Android App ด้วย C# เพื่อสร้าง Column หรือฟิวด์ พร้อม ๆ กับการส่งข้อมูลจาก Android แล้วนำไปจัดเก็บ Insert ไว้ใน Table ของ Mobile Services บน Windows Azure
ในการเขียน Android C# ด้วย Xamarin เพื่อติดต่อกับ Azure Mobile Services เราจะต้องทำการเรียกใช้ Library ที่ได้ถูกออกแบบมาใช้สำหรับการเขียนเพื่อติดต่อกับ Azure Mobile Services โดยเฉพาะ โดยสามารถติดตั้งได้จาก NuGet Package ที่อยู่บน Visual Studio
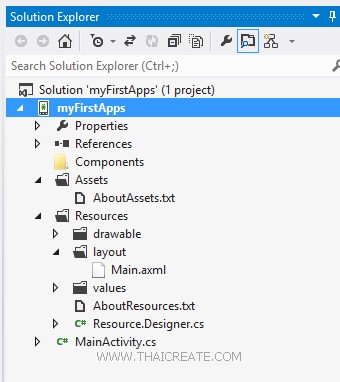
กลับมายัง Project ของ Android C# บน Visual Studio
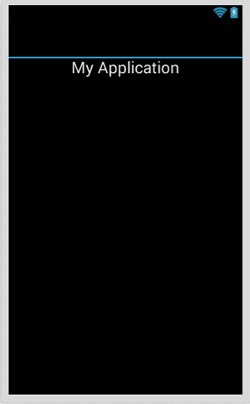
Main.axml
<?xml version="1.0" encoding="utf-8"?>
<LinearLayout xmlns:android="http://schemas.android.com/apk/res/android"
    android:orientation="vertical"
    android:layout_width="fill_parent"
    android:layout_height="fill_parent"
    android:minWidth="25px"
    android:minHeight="25px">
    <TextView
        android:text="My Application"
        android:textAppearance="?android:attr/textAppearanceLarge"
        android:layout_width="match_parent"
        android:layout_height="wrap_content"
        android:id="@+id/textView1"
        android:gravity="center" />
    <TextView
        android:text="Result"
        android:textAppearance="?android:attr/textAppearanceLarge"
        android:layout_width="match_parent"
        android:layout_height="wrap_content"
        android:id="@+id/lblStatus" />
</LinearLayout>
ตอนนี้หน้าจอ App ของเรายังเป็นหน้าจอว่าง
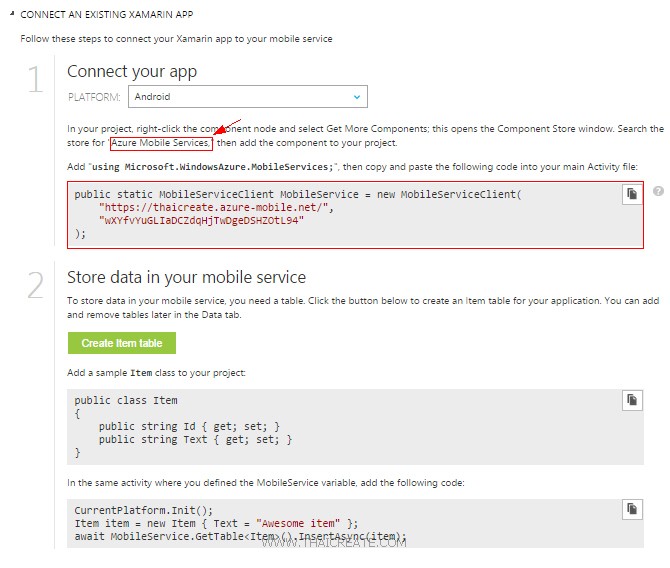
ให้กลับไปยัง Azure Mobile Services บนหน้าขอ Dashboard ซึ่งเราจะได้คำแนะนำในการเรียกใช้งาน ด้วย Android (C#) กับ Xamarin โดยคำแนะนำให้ติดตั้ง Library ผ่าน NuGet Package
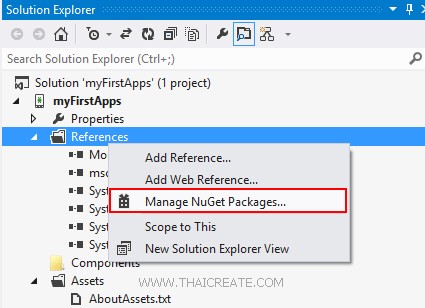
คลิกขวาที่ Preferences เลือก Manage NuGet Package
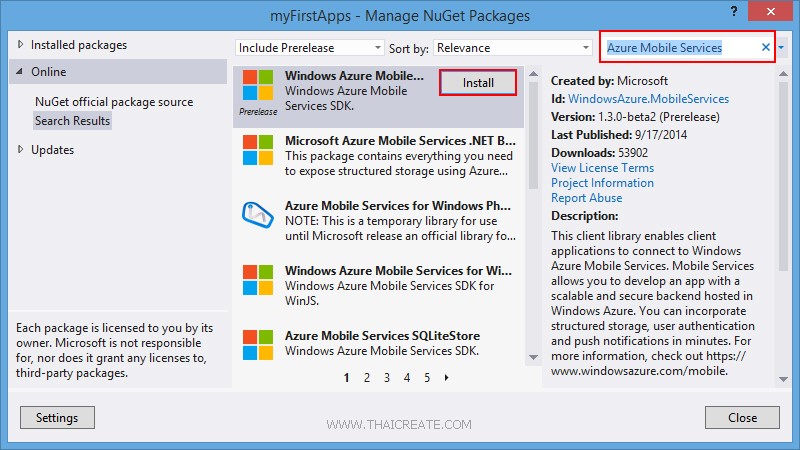
ค้นหาคำว่า "Azure Mobile Services" เลือก "Windows Azure Mobile Services"
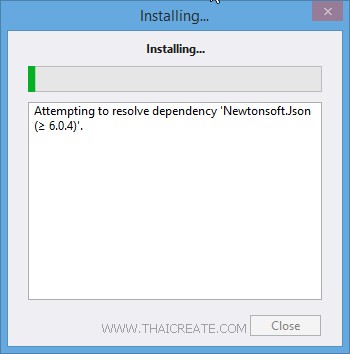
เลือกเพื่อ Install
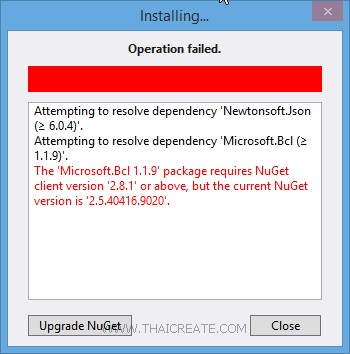
Error
The 'Microsoft.Bcl 1.1.9' package requires NuGet client version '2.8.1' or above, but the current NuGet version is '2.5.40416.9020'
กรณีที่ Error นี้ให้ Upgrade ตัว NuGet ให้เป็น Version 2.8.1 หรือมากกว่า
https://nuget.codeplex.com/releases/view/118318
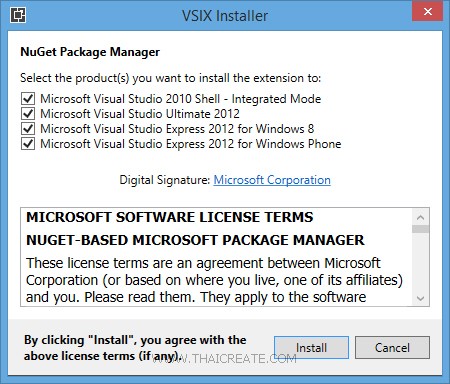
ทำการ Update ตัว NuGet ซะก่อน
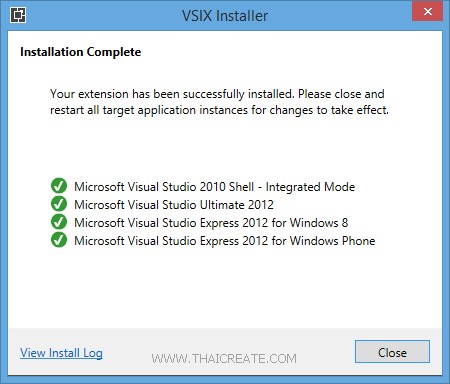
Update NuGet
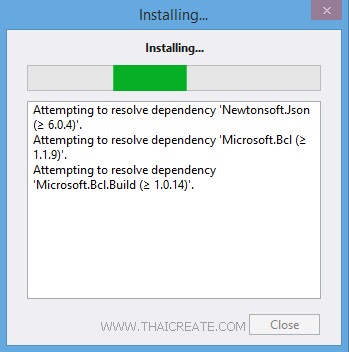
จากนั้นทดสอบการติดตั้งใหม่
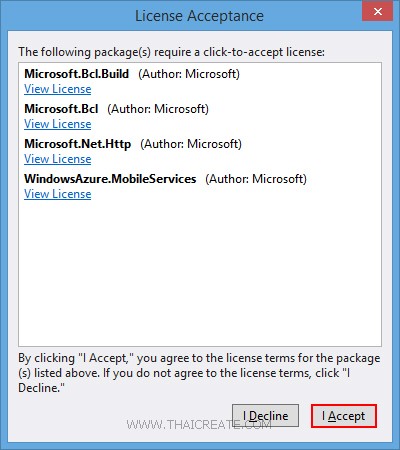
เลือก I Accept
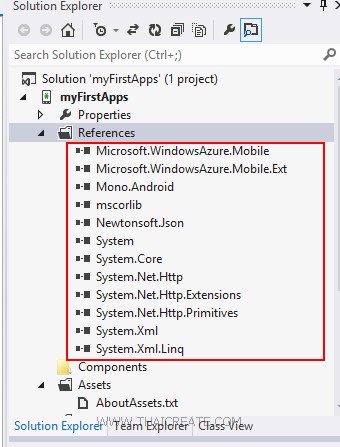
หลังจากที่ติดตั้งเรียบร้อยแล้วรายการ Library ต่าง ๆ จะถูก Include เข้ามาใน Preferences
ขั้นตอนการสร้าง Table หรือตารางบน Azure Mobile Services
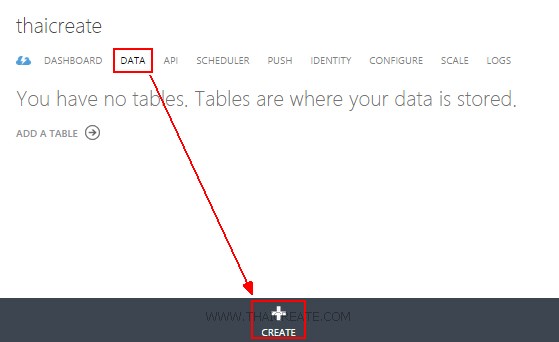
คลิกที่ DATA และเลือก CREATE
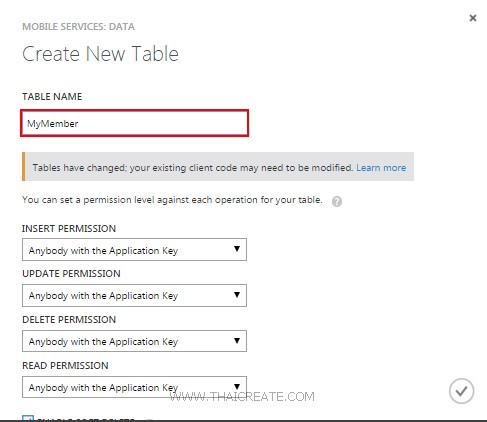
ใส่ชื่อตารางในที่นี้จะใส่เป็น MyMember

ได้ตารางขึ้นมา 1 รายการชื่อว่า MyMember
เพิ่มเติม
จะสังเกตุว่าไม่มีเครื่องมือสำหรับการสร้าง Table และการ Insert ข้อมูล (มีแต่ลบ Column และบน Rows ข้อมูล) แต่ทั้งนี้เราสามารถที่จะสร้าง Column และ Insert ข้อมูลได้จากการเขียน App บน Android
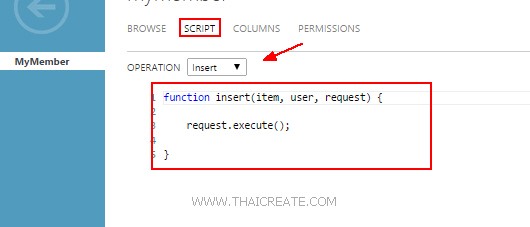
เมนู SCRIPT เป็นพวก Script ที่ไว้ทำหน้าที่รับข้อมูลจาก Android แล้ว Insert ลงใน Table การทำงานคล้าย ๆ กับ Stored Procedure ซึ่งเราสามารถเขียน Script เพิ่มเติมได้ แต่ตอนนี้แนะนำให้กำหนดเป็นค่า Default ซะก่อน
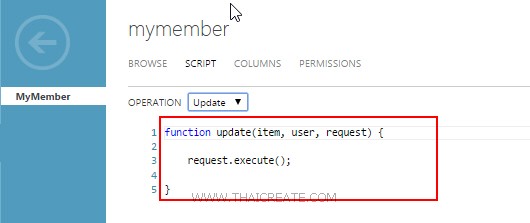
หลัก ๆ จะมีอยู่ 4 ตัวคือ Insert , Update , Delete , Read
การเรียกใช้งานด้วย Android C# (Xamarin)
สร้าง Class สำหรับ Mapping ตัว Table ซึ่ง Property ต่าง ๆ จะได้เป็นชื่อ Column ของ Table
    public class MyMember
    {
        public int Id { get; set; }

        [JsonProperty(PropertyName = "name")]
        public string Name { get; set; }

        [JsonProperty(PropertyName = "email")]
        public string Email { get; set; }
    }
สร้าง URL และ Key ในการเชื่อมต่อ
public const string ApplicationURL = @"https://thaicreate.azure-mobile.net/";
public const string ApplicationKey = @"wXYfvYuGLIaDCZdqHjTwDgeDSHZOtL94";
เชื่อมต่อไปยัง Mobile Services
private MobileServiceClient client; // Mobile Service Client references
client = new MobileServiceClient(ApplicationURL, ApplicationKey);
เรียกใช้และ Mapping ตัว Table
private IMobileServiceTable<MyMember> memberTable; // Mobile Service Table used to access data
memberTable = client.GetTable<MyMember>();
การ Insert ข้อมูล
var item = new MyMember { Name = "Win", Email = "[email protected]" };
await memberTable.InsertAsync(item);
Code เต็ม ๆ
MainActivity.cs
using System;
using Android.App;
using Android.Content;
using Android.Runtime;
using Android.Views;
using Android.Widget;
using Android.OS;

using Microsoft.WindowsAzure.MobileServices;
using Newtonsoft.Json;

namespace myFirstApps
{
    public class MyMember
    {
        public int Id { get; set; }

        [JsonProperty(PropertyName = "name")]
        public string Name { get; set; }

        [JsonProperty(PropertyName = "email")]
        public string Email { get; set; }
    }

    [Activity(Label = "myFirstApps", MainLauncher = true, Icon = "@drawable/icon")]
    public class MainActivity : Activity
    {

        public const string ApplicationURL = @"https://thaicreate.azure-mobile.net/";
        public const string ApplicationKey = @"wXYfvYuGLIaDCZdqHjTwDgeDSHZOtL94";

        private MobileServiceClient client; // Mobile Service Client references
        private IMobileServiceTable<MyMember> memberTable; // Mobile Service Table used to access data

        protected override void OnCreate(Bundle bundle)
        {
            base.OnCreate(bundle);

            // Set our view from the "main" layout resource
            SetContentView(Resource.Layout.Main);

            this.AddData();

        }

        public async void AddData()
        {
            TextView lblStatus = FindViewById<TextView>(Resource.Id.lblStatus);
            try
            {
                client = new MobileServiceClient(ApplicationURL, ApplicationKey);

                memberTable = client.GetTable<MyMember>();

                var item = new MyMember { Name = "Win", Email = "[email protected]" };
                await memberTable.InsertAsync(item);

                lblStatus.Text = "Insert Data Successfully.";
            }
            catch (Exception ex)
            {
                lblStatus.Text = "Insert Data Failed! Error " + ex.Message;
            }

        }


    }
}
ทดสอบการทำงาน
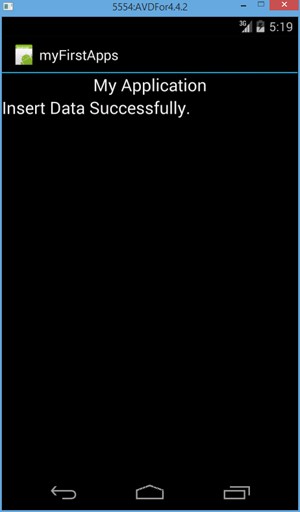
แสดงผลบนหน้าจอ App ของ Android

เมื่อกลับไปดูบน Portal Management ของ Mobile Services จะเห็นว่า Column ถูกสร้าง และ Rows ถูก Insert และจะเห็นว่าบาง Column จะมีการสร้างให้อัตโนมัติเช่น _createAt , _updateAt
บทความที่เกี่ยวข้อง
|
 ช่วยกันสนับสนุนรักษาเว็บไซต์ความรู้แห่งนี้ไว้ด้วยการสนับสนุน Source Code 2.0 ของทีมงานไทยครีเอท ช่วยกันสนับสนุนรักษาเว็บไซต์ความรู้แห่งนี้ไว้ด้วยการสนับสนุน Source Code 2.0 ของทีมงานไทยครีเอท
|
|
| |
By : |
ThaiCreate.Com Team (บทความเป็นลิขสิทธิ์ของเว็บไทยครีเอทห้ามนำเผยแพร่ ณ เว็บไซต์อื่น ๆ) |
| |
Score Rating : |
    |
|
| |
Create/Update Date : |
2014-09-23 13:11:51 /
2017-03-26 21:01:03 |
| |
Download : |
No files |
|
|
Sponsored Links / Related |
|
|
|
|
|
|

|