Event Handler บน Windows Store Apps กับ Controls ผ่าน XAML (C#) |
Event Handler บน Windows Store Apps กับ Controls ผ่าน XAML (C#) การสร้าง Event เป็นส่วนของโปรแกรมที่ทำหน้าที่ควมคุม Controls กับ User Interface การสร้าง Event จะทำงานร่วมกับภาษา C# ที่ทำหน้าที่เป็น Code Behind โดย Event ต่าง ๆ อาจจะเกิดจากส่วนของโปรแกรมทำงานเองอัตโนมัติ หรือจะเป็น Event ที่รอการโต้ตอบจาก User เช่น ปุ่ม Button เราสามารถสร้าง Event ของการคลิก และหลังจากที่คลิกที่ Controls ของ Button ก็จะมีการสั่งให้ Event ที่อยู่ใน Code Behind ทำงานอื่น ๆ ต่อไป สำหรับการสร้าง Event โดยพื้นฐานแล้วสามารถสร้างได้ 2 รูปแบบคือ
แบบที่ 1 สร้าง Event จากการ Property ของ Control
<Button Content="Submit" Margin="148,213,0,0" Name="btnSubmit" Click="btnSubmit_Click" />

private void btnSubmit_Click(object sender, RoutedEventArgs e)
{

}
แบบที่ 2 สร้าง Event ในส่วนของ Code Behind ที่เกิดขึ้นหลังจาก Runtime แล้ว
// Constructor
public MainPage()
{
	InitializeComponent();

	btnSubmit.Click += this.btnSubmit_Click;

}

private void btnSubmit_Click(object sender, RoutedEventArgs e)
{

}
โดยทั้ง 2 วิธีได้ผลลัพธ์ที่เหมือนกัน
ตัวอย่างการสร้าง Event รับค่าจาก TextBox เกิด Event ของ Button จากการคลิก และการแสดงผลไปยัง TextBlock
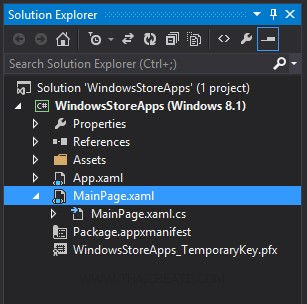
ในหน้า Project ของ Windows Store Apps ด้วย C#
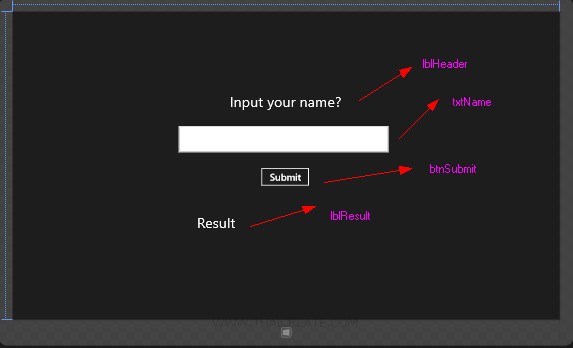
ออกแบบหน้าจอดังรูป โดยประกอบด้วย Controls ของ TextBlock , TextBox และ Button โดยตั้ง ID หรือชื่อ ดังรูป โดยจากโจทย์นี้เราจะให้ User ทำการกรอกชื่อ ที่ txtName และเมื่อคลิกที่ btnSubmit จะแสดงผลลัพ์ที่ lblResult
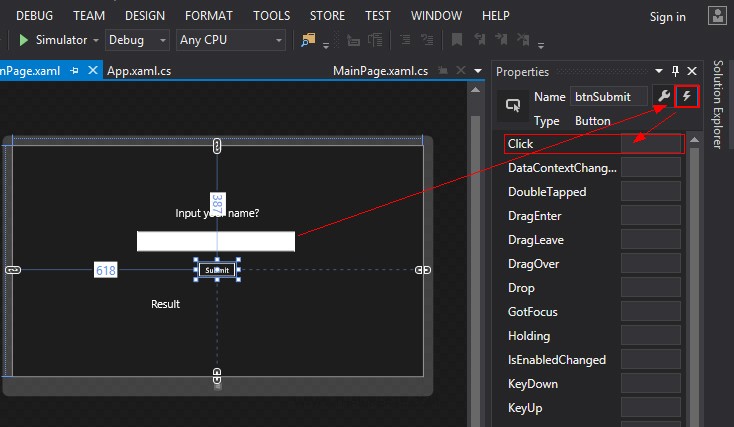
ขั้นตอนนี้จะเป็นการสร้าง Event การ Click ที่ Button ซึ่งปกติแล้วเราสามารถใช้การ DoubleClick ที่ Button ของ btnSubmit เพื่อสร้าง Event ได้ทันที หรือจะคลิกที่ Button ของ btnSubmit เลือก Properties ดังเบิ้ลคลิกดังรูป โดยการสร้าง Event จะมี Event ต่าง ๆ มากมายตามวัตถุประสงค์
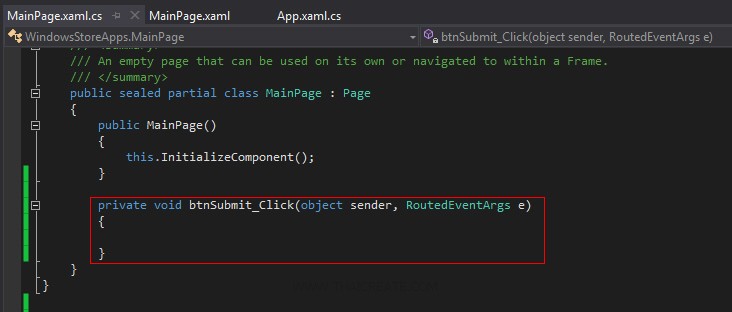
หลังจากนั้นเราจะได้ Event ที่เกิดขึ้นในส่วนของ C# (Code Behind) โดยเขียนคำสั่งง่าย ๆ ดังนี้
        private void btnSubmit_Click(object sender, RoutedEventArgs e)
        {
            this.lblResult.Text = "Sawatdee Khun " + this.txtName.Text.ToString();
        }
ทดสอบการทำงาน
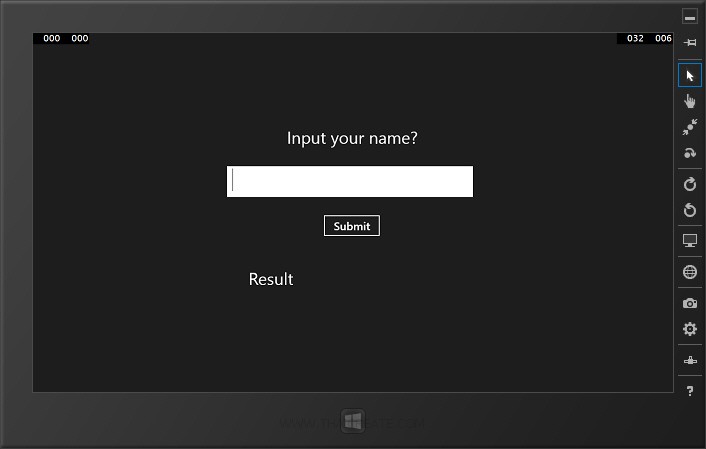
หน้าจอของ Apps
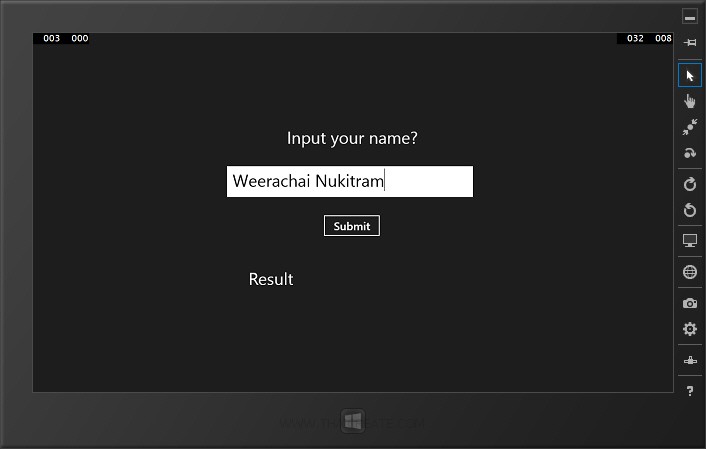
ให้ทดสอบกรอกชื่อ
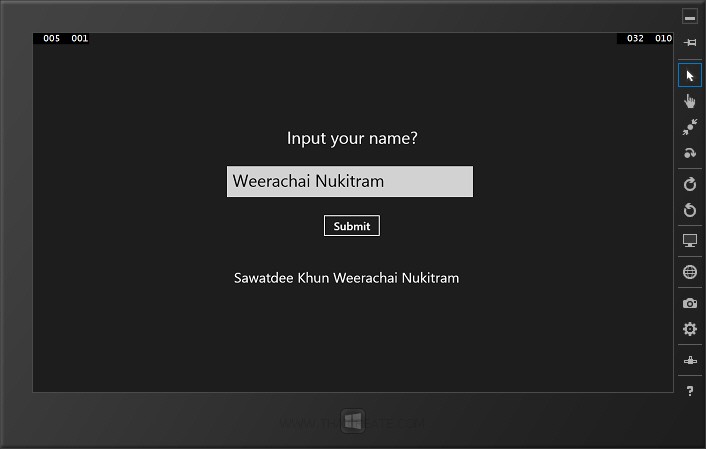
จากนั้นคลิกที่ปุ่ม Submit ซึ่งโปรแกรมจะแสดงข้อความโต้ตอบดังรูป
Code ทั้งหมด
MainPage.xaml
<Page
    x:Class="WindowsStoreApps.MainPage"
    xmlns="http://schemas.microsoft.com/winfx/2006/xaml/presentation"
    xmlns:x="http://schemas.microsoft.com/winfx/2006/xaml"
    xmlns:local="using:WindowsStoreApps"
    xmlns:d="http://schemas.microsoft.com/expression/blend/2008"
    xmlns:mc="http://schemas.openxmlformats.org/markup-compatibility/2006"
    mc:Ignorable="d">

    <Grid Background="{ThemeResource ApplicationPageBackgroundThemeBrush}">
        <TextBlock x:Name="lblTitle" HorizontalAlignment="Center" Margin="542,205,537,0" TextWrapping="Wrap" Text="Input your name?" VerticalAlignment="Top" Height="43" Width="287" FontSize="36"/>
        <TextBox x:Name="txtName" HorizontalAlignment="Left" Height="66" Margin="414,285,0,0" TextWrapping="Wrap" VerticalAlignment="Top" Width="525" FontFamily="Global User Interface" FontSize="36"/>
        <Button x:Name="btnSubmit" Content="Submit" HorizontalAlignment="Left" Margin="618,387,0,0" VerticalAlignment="Top" Height="50" Width="125" FontSize="24" Click="btnSubmit_Click"/>
        <TextBlock x:Name="lblResult" Margin="429,507,0,0" TextWrapping="Wrap" VerticalAlignment="Top" FontSize="30" Width="510" RenderTransformOrigin="0.035,0.558" HorizontalAlignment="Left" Text="Result"/>

    </Grid>
</Page>
MainPage.xaml
using System;
using System.Collections.Generic;
using System.IO;
using System.Linq;
using System.Runtime.InteropServices.WindowsRuntime;
using Windows.Foundation;
using Windows.Foundation.Collections;
using Windows.UI.Xaml;
using Windows.UI.Xaml.Controls;
using Windows.UI.Xaml.Controls.Primitives;
using Windows.UI.Xaml.Data;
using Windows.UI.Xaml.Input;
using Windows.UI.Xaml.Media;
using Windows.UI.Xaml.Navigation;

// The Blank Page item template is documented at http://go.microsoft.com/fwlink/?LinkId=234238

namespace WindowsStoreApps
{
    /// <summary>
    /// An empty page that can be used on its own or navigated to within a Frame.
    /// </summary>
    public sealed partial class MainPage : Page
    {
        public MainPage()
        {
            this.InitializeComponent();
        }

        private void btnSubmit_Click(object sender, RoutedEventArgs e)
        {
            this.lblResult.Text = "Sawatdee Khun " + this.txtName.Text.ToString();
        }
    }
}
จากบทความนี้เราจะเห็นว่าการสร้าง Event Handler บน Windows Store Apps นั้นง่ายมาก และก็ไม่แตกต่างกับการเขีัยนโปรแกรมอื่น ๆ ด้วยภาษา .Net Framework เลย และ Controls แต่ล่ะตัวบน Windows Store Apps ก็ค่อนข้างจะมีรูปแบบที่ใช้งานค่อนข้างจะง่าย ซึ่งในบทความถัด ๆ ไป ทางทีมงานจะพยายามยกตัวอย่าง Controls ต่าง ๆ ที่คิดว่าจะมีประโยชน์ในการเขียน Apps มา Windows Store
.
|
 ช่วยกันสนับสนุนรักษาเว็บไซต์ความรู้แห่งนี้ไว้ด้วยการสนับสนุน Source Code 2.0 ของทีมงานไทยครีเอท ช่วยกันสนับสนุนรักษาเว็บไซต์ความรู้แห่งนี้ไว้ด้วยการสนับสนุน Source Code 2.0 ของทีมงานไทยครีเอท
|
|
| |
By : |
ThaiCreate.Com Team (บทความเป็นลิขสิทธิ์ของเว็บไทยครีเอทห้ามนำเผยแพร่ ณ เว็บไซต์อื่น ๆ) |
| |
Score Rating : |
  |
|
| |
Create/Update Date : |
2014-01-19 12:55:56 /
2017-03-19 14:35:24 |
| |
Download : |
No files |
|
|
Sponsored Links / Related |
|
|
|
|
|
|

|